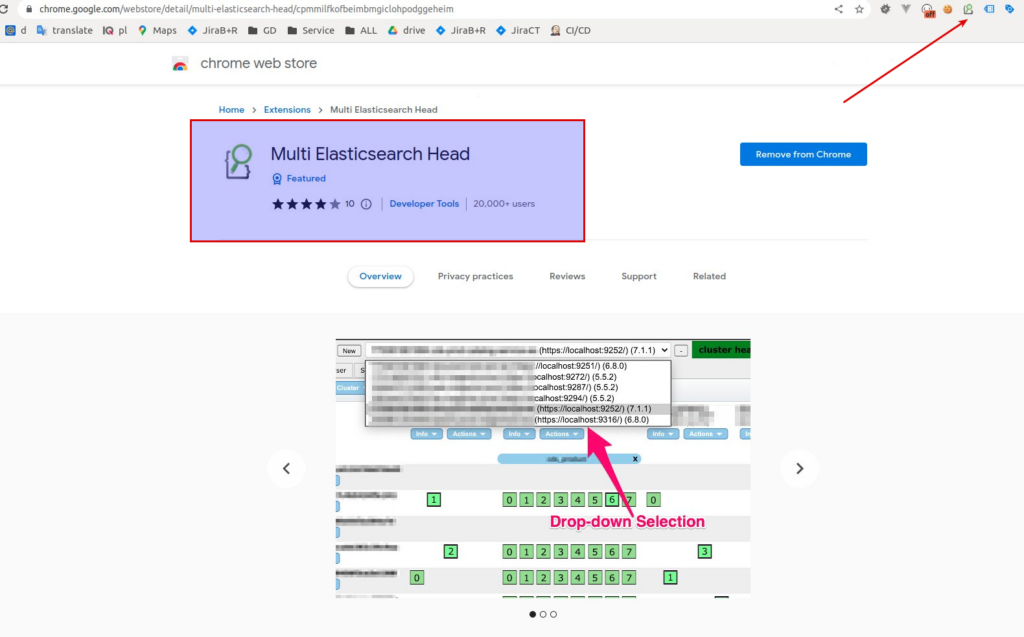
At that article we will install elasticsearch head plugin and postman tool – that will allow us to work with elasticsearh in convenient way staying at lower level. We will also index several test documents and run first search queries upon it. To install chrome elasticsearch plugin – go to the chrome extensions web store and search by phrase “Multi Elasticsearch Head”. Here is the screen how it looks like. After installing the plugin and applying “Pin” function at extensions menu – you have to see the icon as it is shown at screen with red arrow
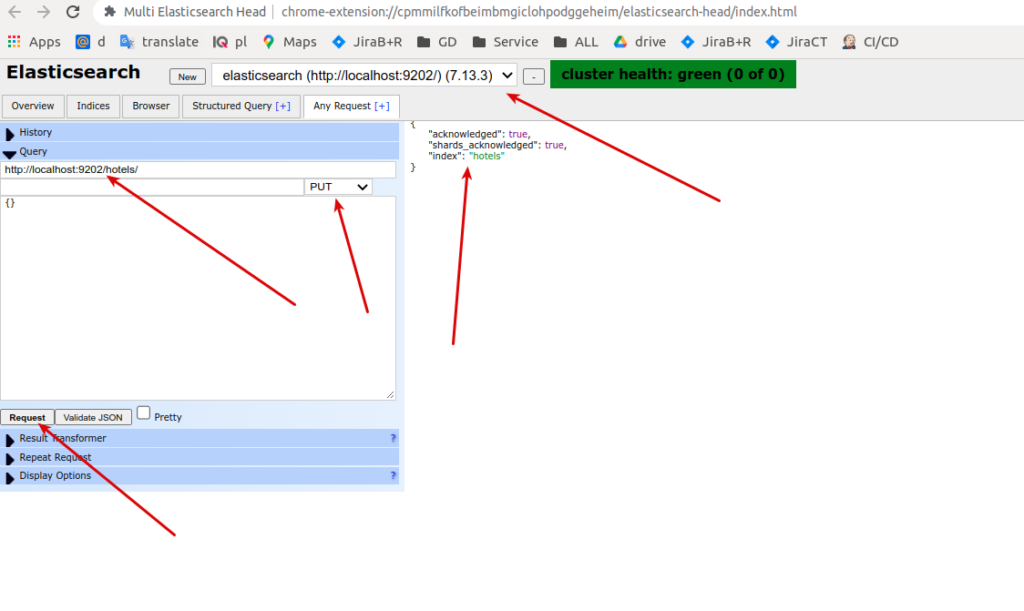
Click at that icon, set the connection url (in my case it is localhost:9202), connect to your elasticsearch instance or cluster and then go to the “Any request” tab -> choose “PUT” HTTP verb and pass http://localhost:9202/hotels/ as request url address – then enter “Request button” – all that steps are displayed at screen below
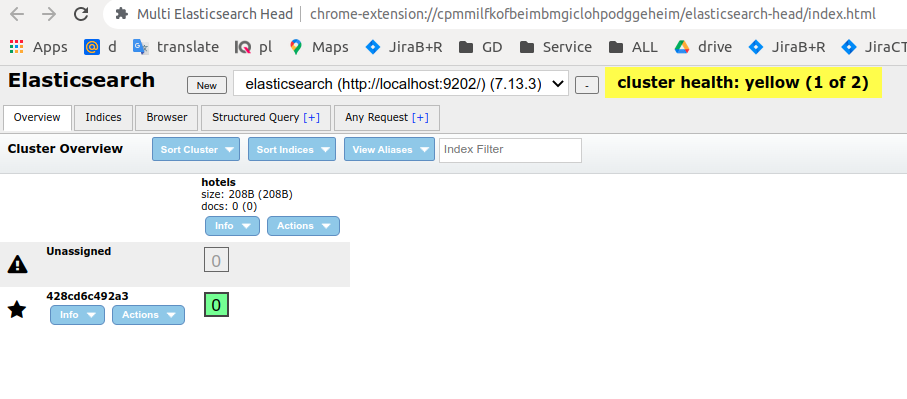
In case you did all properly – you have to get “acknowledged: true” response. You also would able to see newly created index at “Overview” and “Index” tabs after refreshing the page as it shown at screen below. The big advantage of chrome plugin is that you also can validate any json DSL body content using special “Validate JSON” button. You may also use “Pretty” checkbox before running validation to format your json at readable format.
Ok, seems all is good but there is one essential note. For testing purposes we have to create an index with just one primary shard. I don’t want to put at your head to much information at once. If you are interested in details now – please apply to the 5th udemy course section at shards lecture (the link to the course is at the bottom of current article). Here I will try to explain what it means as short as possible. Elasticsearch has a distribution nature. It was designed to be HA and scalable. Index data is spread over different cluster nodes using special building blocks that are called shards. From another side we have a relevance – at ES that is a number (it is called score) that reflects how good according document matches our search. The deal is that score calculated per shard using different statistical metrics. And in case we have a lot of data – statistics works as it should. In case we have a small amount of data and several shards (e.g 2) there is a great probability that data would not be distributed equally. And as a result we can get strange search results. Generally, by default, you should get index with number_of_shards = 1, but we also can set it explicitly by adding special parameter as json body of PUT requests. Lets remove our hotels index and create it once more time with setting shards number equal to 1. But that time lets use Postman tool for that purpose. To install postman follow according installation instructions . The great advantage of Postman is that you can save all requests and organize it at groups. Here is how it looks like at practice

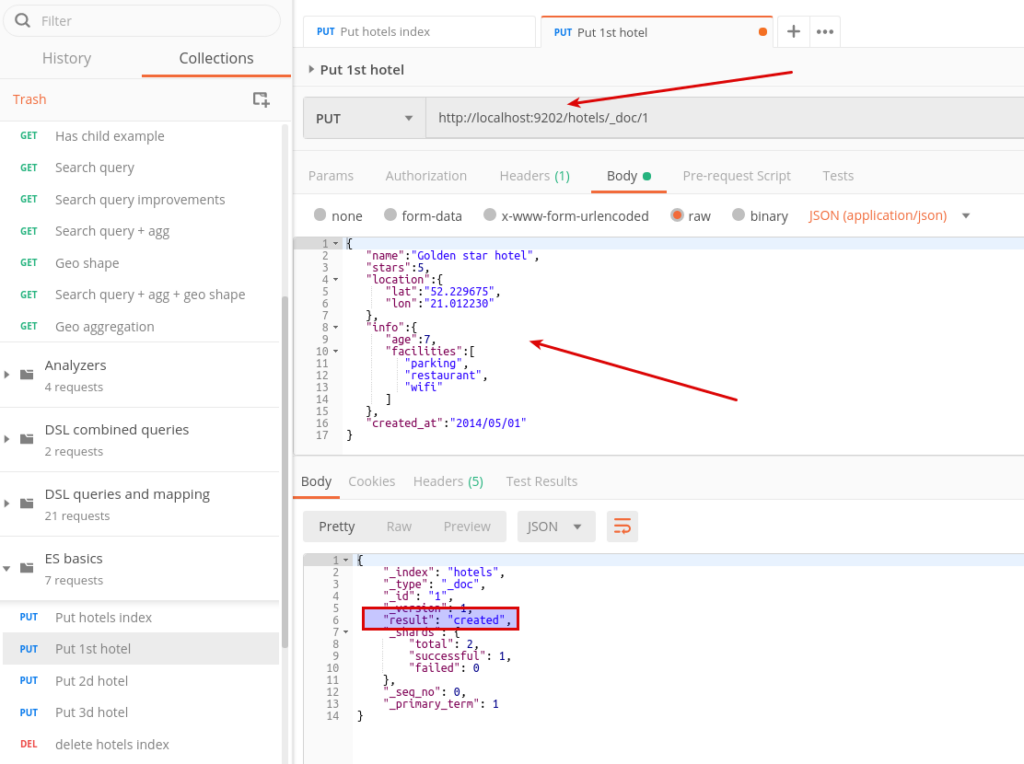
Now lets index first document to elasticsearch using next json body:
{
   "name":"Golden star hotel",
   "stars":5,
   "location":{
      "lat":"52.229675",
      "lon":"21.012230"
   },
   "info":{
      "age":7,
      "facilities":[
         "parking",
         "restaurant",
         "wifi"
      ]
   },
   "created_at":"2014/05/01"
}
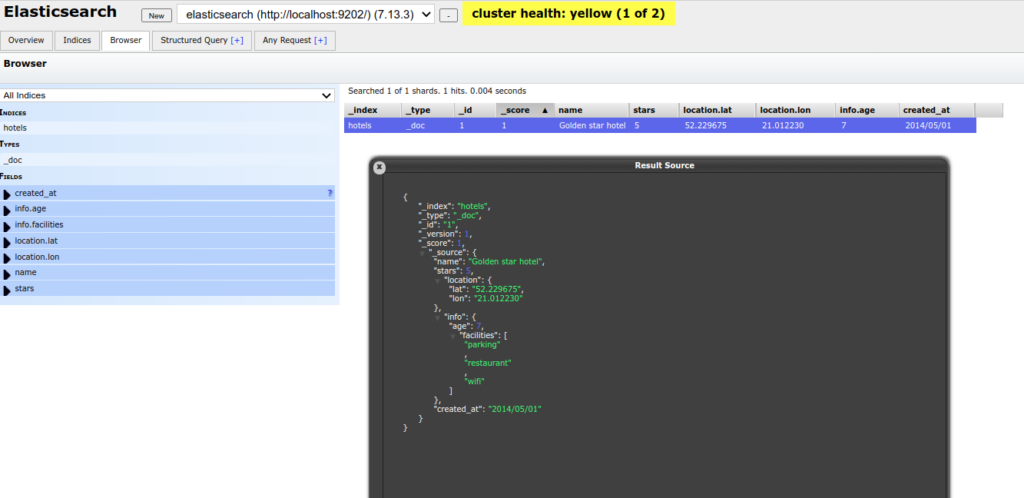
You may also verify that document is indexed properly using elasticsearch chrome extension, refresh the page and go to the “Browser” tab, then click at the row with indexed document -> you have to see something like that:
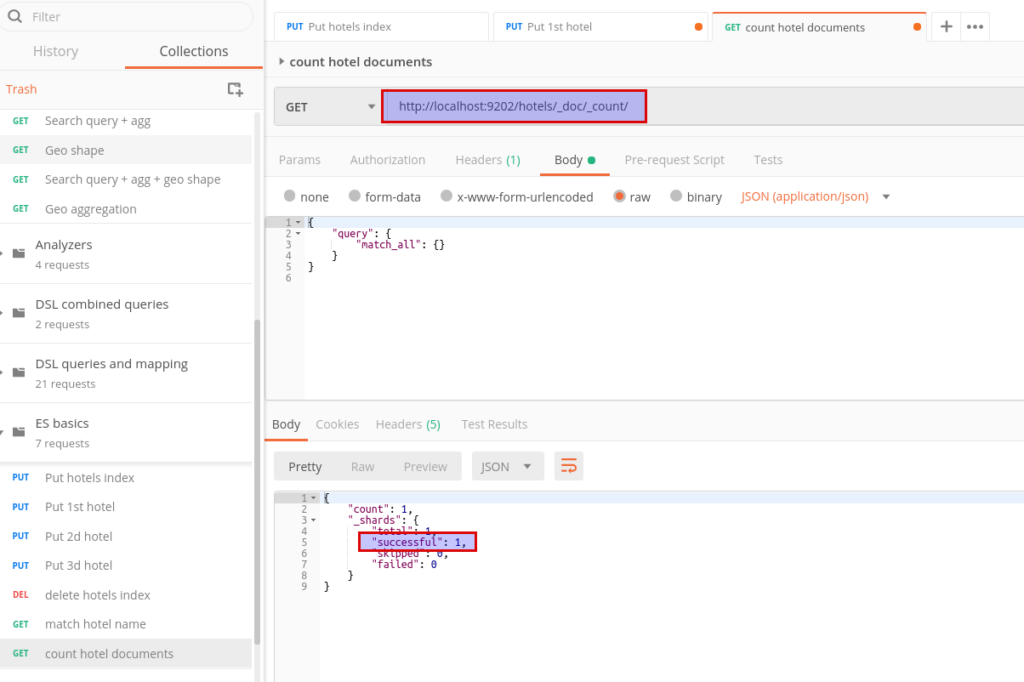
Now, when we have the first document at our index – we can run some first simple DSL queries – lets count the number of documents at our index using Postman and special word _count
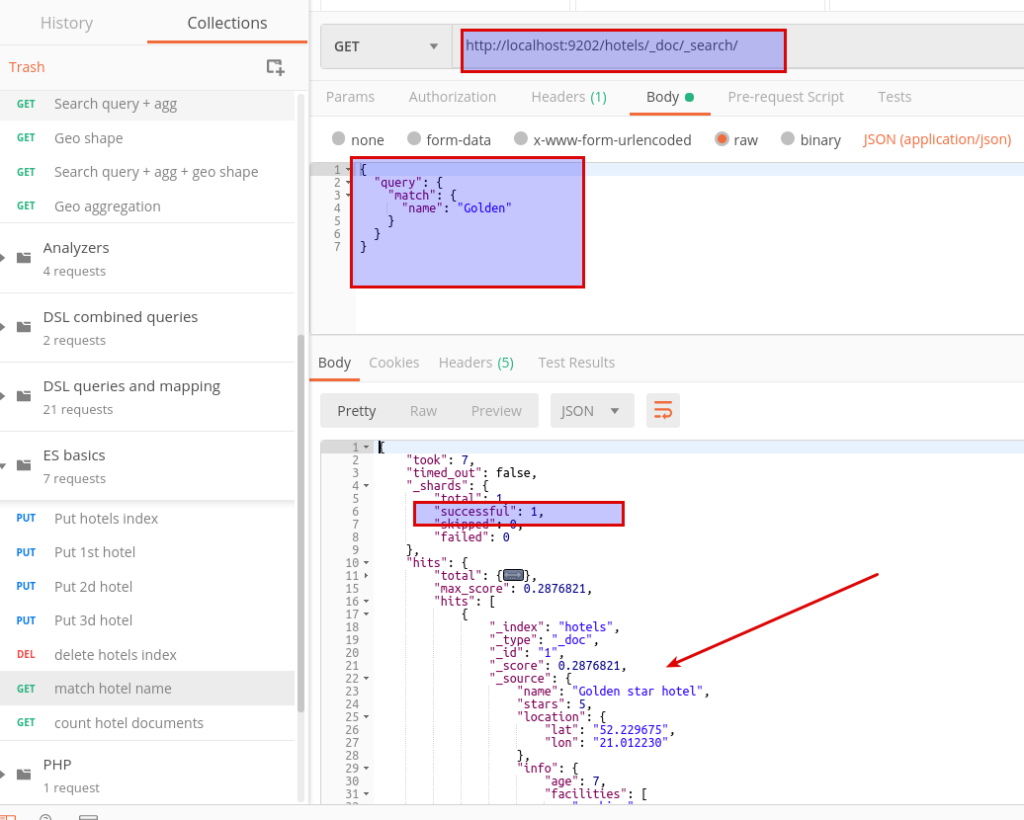
And now lets perform some simple search query – we can try to find our hotel using next DSL JSON query and special word “_search”
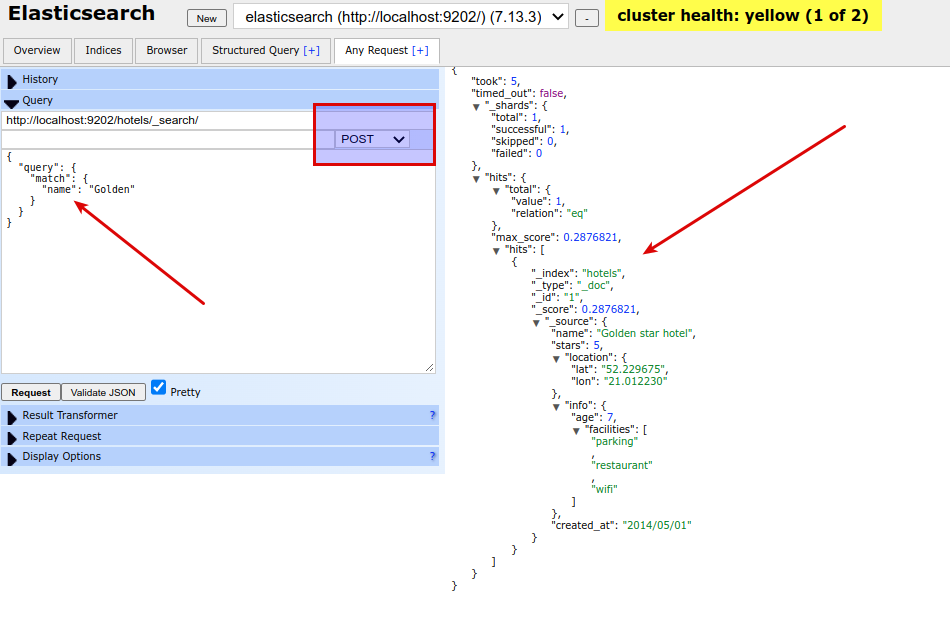
We can perform the same search query from chrome plugin – but there is one essential notice here. Plugin is not sending json body while running GET queries. As result elasticsearch will simply return all documents form index without applying json DSL query part:( As for me that is bug – so be careful with that! But there is workaround for it – replace GET http verb with POST. Below is the screen:
So, my congratulations. Now you are able to create index and add to it documents. You also know how to use elasticsearch chrome extension to visualize Elasticsearch indexes, documents and content inside it. You also know how run simple DSL queries against elasticsearch engine using REST API + Postman or chrome elasticsearch plugin. At the next article we will speak about mapping and why it is so important. We will also run more complicated DSL queries. Thank you for being with me whole that time. If you want to know more, please, wait for the next article or welcome to my course.