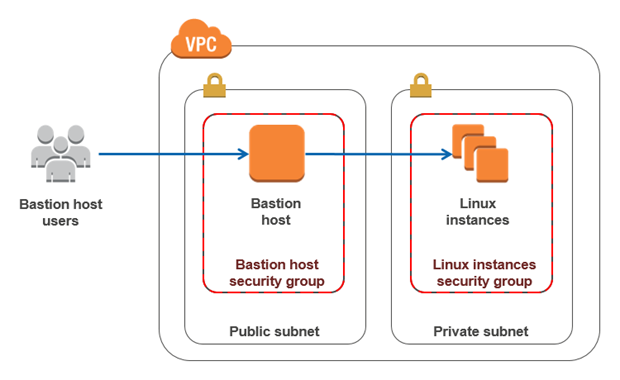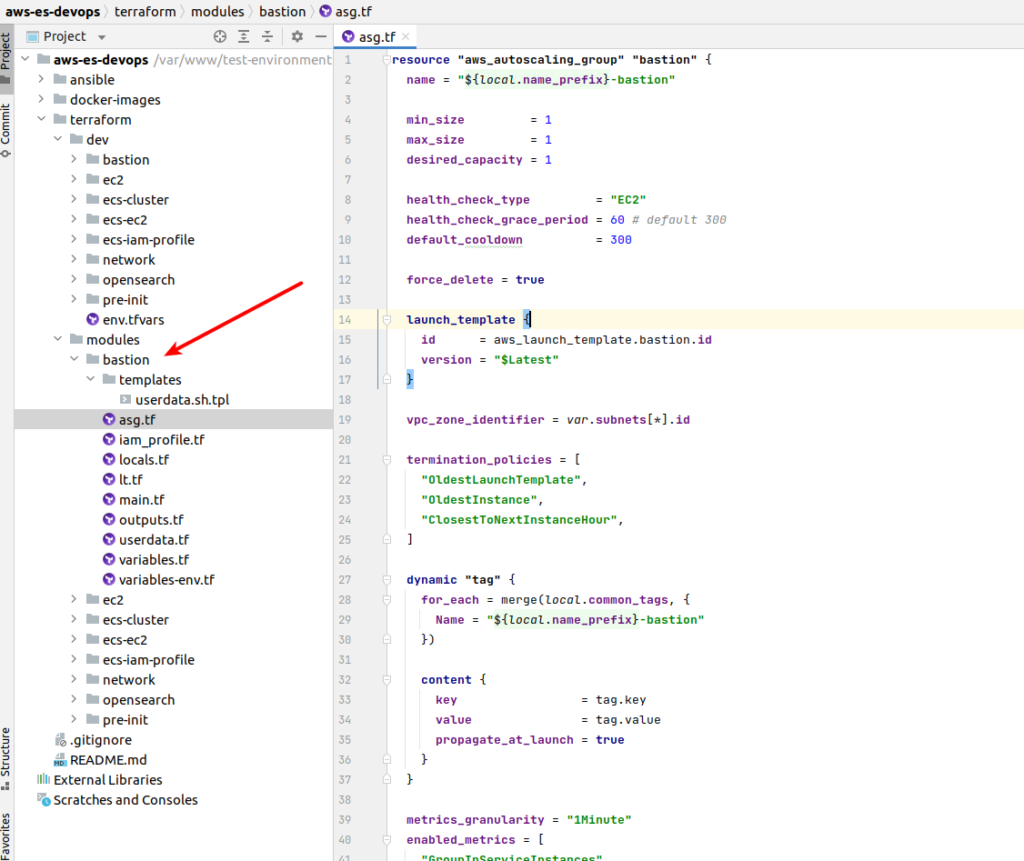
Hi, devops fans. From time to time we need to access different resources inside aws private network, e.g for debugging purposes. Bastion hosts (which are also called “jump servers”) are often used as a best practice for accessing privately accessible hosts within a system environment. Yes, yes, I know that most of you will say now – that SSM (Systems Manager Agent) is a better solution. And In most cases I agree with that as you don’t have to take care about bastion hosts, it is more safe. But, in the case of elasticsearch it is very useful to make different ssh forward tunnels, e.g in order to connect cluster to elasticsearch plugin or open opensearch dashboard for local usage. Personally for me, it is much more convenient to do it using ssh client and ssh config. It is also not a problem to manage bastion via terraform, which I am going to show you now. Let’s open the bastion terraform module.

I am going to deploy bastion using a small trick – autoscaling group. What benefits does it give? The answer is – free high availability. We will define an autoscaling group with one instance and it will allow us to deploy instance at any of our public subnets. So in case some of the aws zone will fall down for any reason – our bastion will be redeployed at another one available zone – terraform/modules/bastion/asg.tf:
resource "aws_autoscaling_group" "bastion" {
  name = "${local.name_prefix}-bastion"

  min_size         = 1
  max_size         = 1
  desired_capacity = 1

  health_check_type         = "EC2"
  health_check_grace_period = 60 # default 300
  default_cooldown          = 300

  force_delete = true

  launch_template {
    id      = aws_launch_template.bastion.id
    version = "$Latest"
  }

  vpc_zone_identifier = var.subnets[*].id

  termination_policies = [
    "OldestLaunchTemplate",
    "OldestInstance",
    "ClosestToNextInstanceHour",
  ]

  dynamic "tag" {
    for_each = merge(local.common_tags, {
      Name = "${local.name_prefix}-bastion"
    })

    content {
      key                 = tag.key
      value               = tag.value
      propagate_at_launch = true
    }
  }

  metrics_granularity = "1Minute"
  enabled_metrics = [
    "GroupInServiceInstances"
  ]

  protect_from_scale_in = false
}
And here is our launch template, where we define most things – terraform/modules/bastion/lt.tf:
resource "aws_launch_template" "bastion" {
  name        = "${local.name_prefix}-bastion"
  description = "${local.name_prefix}-bastion"

  image_id      = var.image_id
  ebs_optimized = true
  instance_type = var.instance_type
  key_name      = var.key_name

  vpc_security_group_ids = [var.sg.id]

  disable_api_termination              = false
  instance_initiated_shutdown_behavior = "terminate"

  iam_instance_profile {
    name = aws_iam_instance_profile.bastion.name
  }

  monitoring {
    enabled = false
  }

  dynamic "tag_specifications" {
    for_each = ["instance", "volume"]

    content {
      resource_type = tag_specifications.value

      tags = merge(local.common_tags, {
        Name = "${local.name_prefix}-bastion"
      })
    }
  }

  tags = local.common_tags

  block_device_mappings {
    device_name = "/dev/sda1"

    ebs {
      volume_size           = var.volume_size
      volume_type           = "gp3"
      encrypted             = true
      delete_on_termination = true
    }
  }

  user_data = data.template_cloudinit_config.bastion.rendered

  lifecycle {
    create_before_destroy = true
  }
}
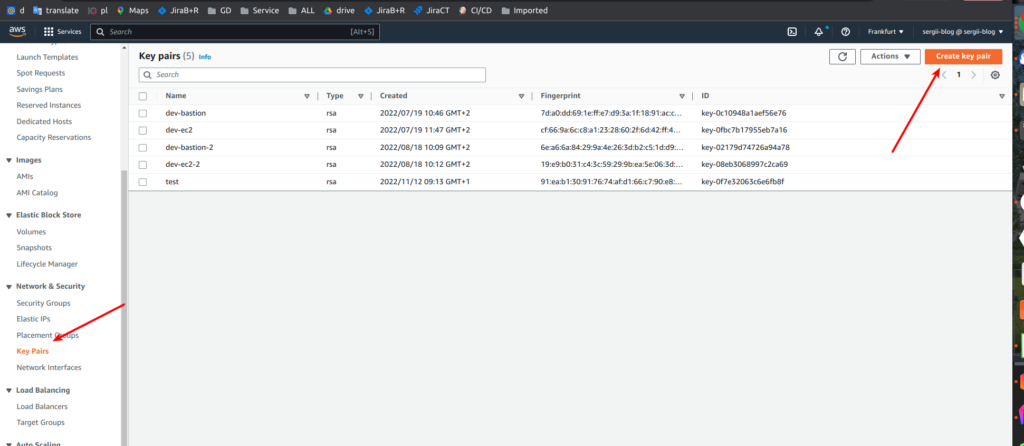
Suppose that image and instance type are clear. The key name – is the name of the ssh key that would be attached to our bastion. Where do we take it? Here is AWS console -> go to the EC2 section and find key-pairs section.

Here we can generate an ssh key pair and call it with some custom name which would be our key_name value. After the key name we define the security group – we are going to pass to our module management security group that we already created at terraform network module article. I will show it in a moment – at the module implementation part. Let’s finish at first with the launch template. So, then we enable monitoring, add tags and define our volume. Here we also add the possibility to add some custom things during instance initialization. That is done with using template_cloudinit_config resource – terraform/modules/bastion/userdata.tf:
data "template_cloudinit_config" "bastion" {
  gzip          = true
  base64_encode = true

  part {
    content_type = "text/x-shellscript"

    content = templatefile("${path.module}/templates/userdata.sh.tpl", {
      region = var.region
    })
  }
}
And here is some template by itself as an example:
#!/bin/bash
# terraform/modules/bastion/templates/userdata.sh.tpl:
set -o errexit
set -o nounset

apt-get -q update
apt-get -qy install awscli
There is also an iam profile, which is defined here – it is rather simple – only assume role and custom tags – terraform/modules/bastion/iam_profile.tf:
### INSTANCE POLICY

data "aws_iam_policy_document" "common_instance_assume" {
  statement {
    actions = ["sts:AssumeRole"]

    principals {
      identifiers = ["ec2.amazonaws.com"]
      type        = "Service"
    }
  }
}

resource "aws_iam_role" "bastion_instance" {
  name               = "${local.name_prefix}-bastion-instance"
  assume_role_policy = data.aws_iam_policy_document.common_instance_assume.json

  tags = local.common_tags
}

resource "aws_iam_instance_profile" "bastion" {
  name = "${local.name_prefix}-bastion"
  role = aws_iam_role.bastion_instance.name
}
And that is almost all. Let’s briefly visit our variables, locals and main tf files:
# terraform/modules/bastion/locals.tf

locals {
  name_prefix = format("%s-%s", var.project, var.env)

  common_tags = {
    Env       = var.env
    ManagedBy = "terraform"
    Project   = var.project
  }
}
# terraform/modules/bastion/variables-env.tf
variable "account_id" {
type = string
description = "AWS Account ID"
}
variable "env" {
type = string
description = "Environment name"
}
variable "project" {
type = string
description = "Project name"
}
variable "region" {
type = string
description = "AWS Region"
}# terraform/modules/bastion/variables.tf
variable "image_id" {
type = string
}
variable "instance_type" {
type = string
}
variable "key_name" {
type = string
}
variable "volume_size" {
type = number
}
variable "sg" {
type = object({
arn = string
description = string
egress = set(object({
cidr_blocks = list(string)
description = string
from_port = number
ipv6_cidr_blocks = list(string)
prefix_list_ids = list(string)
protocol = string
security_groups = set(string)
self = bool
to_port = number
}))
id = string
ingress = set(object({
cidr_blocks = list(string)
description = string
from_port = number
ipv6_cidr_blocks = list(string)
prefix_list_ids = list(string)
protocol = string
security_groups = set(string)
self = bool
to_port = number
}))
name = string
name_prefix = string
owner_id = string
revoke_rules_on_delete = bool
tags = map(string)
timeouts = map(string)
vpc_id = string
})
}
variable "subnets" {
type = set(object({
arn = string
assign_ipv6_address_on_creation = bool
availability_zone = string
availability_zone_id = string
cidr_block = string
id = string
ipv6_cidr_block = string
ipv6_cidr_block_association_id = string
map_public_ip_on_launch = bool
outpost_arn = string
owner_id = string
tags = map(string)
timeouts = map(string)
vpc_id = string
}))
}# terraform/modules/bastion/main.tf
terraform {
required_providers {
aws = {
source = "hashicorp/aws"
version = "~> 4.16"
}
}
required_version = "~> 1.2"
}Please, pay attention at security groups and subnets – that is a format we should preserve as we are going to pass current values from our s3 remote state. That is why before applying terraform module you need implement network module as described at article relate to it.. Here is how it looks at implementation – terraform/dev/bastion/main.tf:
terraform {
  backend "s3" {
    bucket         = "terraform-state-aws-es-devops"
    dynamodb_table = "terraform-state-aws-es-devops"
    encrypt        = true
    key            = "dev-bastion.tfstate"
    region         = "eu-central-1"
  }
}

data "terraform_remote_state" "network" {
  backend = "s3"

  config = {
    bucket = "terraform-state-aws-es-devops"
    key    = "dev-network.tfstate"
    region = var.region
  }
}

provider "aws" {
  allowed_account_ids = [var.account_id]
  region              = var.region
}

module "bastion" {
  source = "../../modules/bastion"

  account_id = var.account_id
  env        = var.env
  project    = var.project
  region     = var.region

  volume_size   = 30
  key_name      = "dev-bastion-2"
  instance_type = "t3a.micro"
  image_id      = "ami-0502e817a62226e03"

  sg      = data.terraform_remote_state.network.outputs.sg_management
  subnets = data.terraform_remote_state.network.outputs.subnets_public
}
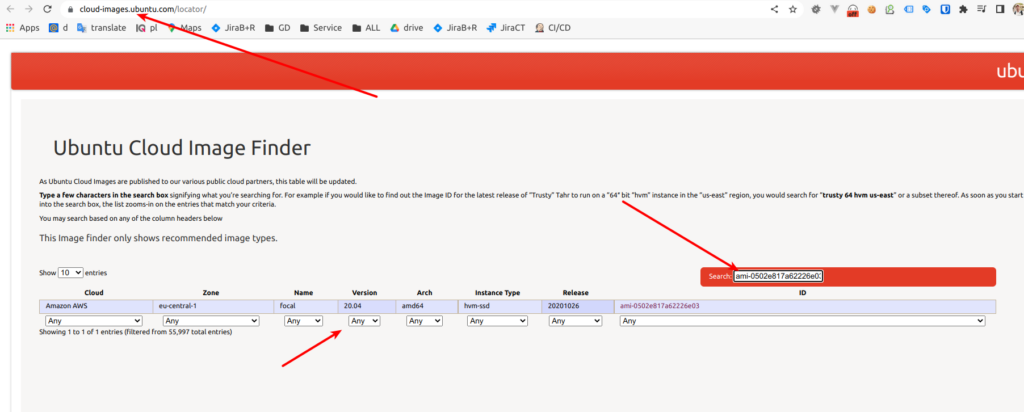
So we define a network remote state and pass security groups and subnets as variables to our bastion module. We are going to use micro instance and ubuntu 20.04 version

Great, now we can apply terraform. After doing it you can verify that your bastion instance was successfully deployed from AWS console side. So, now can we use such a bastion to connect to AWS resources at private network in a safe way. Lets look at ssh config example with using bastion as proxy jump server for connection at some EC2 with name udemy-dev-app-a:
Host *
  ServerAliveInterval 600
  PasswordAuthentication no
  AddressFamily inet

Host udemy-dev-bastion
    # chanage it at bastion IP address
    HostName x.x.x.x
    User ubuntu
    IdentitiesOnly yes
    # path at local PC to the ssh key defined and uploaded at ec2 key pairs section
    # look at screen above in the article
    IdentityFile ~./ssh/some_path
    AddKeysToAgent yes
    ForwardAgent yes

Host udemy-dev-app-a
    # some ec2 private ip as example
    HostName 172.27.72.50
    User ec2-user # user depends at AMI
    IdentitiesOnly yes
    # path at local PC to the ssh key defined and uploaded at ec2 key pairs section
    # look at screen above in the article
    IdentityFile ~./ssh/some_path
    ProxyJump udemy-dev-bastion
So now, while using ssh udemy-dev-app-a from you console you will be able to connect to ec2 at private network using bastion host that will forward your ssh connection. At the same time bastion allows only SSH connection at your vpn while list ip addresses, which are defined at security groups – that gives us high protection from security perspective.
That all, my congratulations – now we are ready to learn how to deploy ElasticSearch/OpenSearch clusters at AWS. See you at the next articles. If you still have some questions, as always, you may refer to online udemy course. As the reader of that blog you are also getting possibility to use coupon for the best possible low price. P.S. Don’t forget to destroy AWS resources in the end 😉
