Hi, terraform fans.
At previous article we discussed how to create Elasticsearch Docker file, build from it the image and push it to the AWS docker registry, at current one – we will examine terraform modules, related to AWS ECS Elasticsearch deployment, from higher perspective and concentrate at security issues around assume role policies. Let’s look at terrafrom modules related to ECS at 1st from physical file’s structure level:
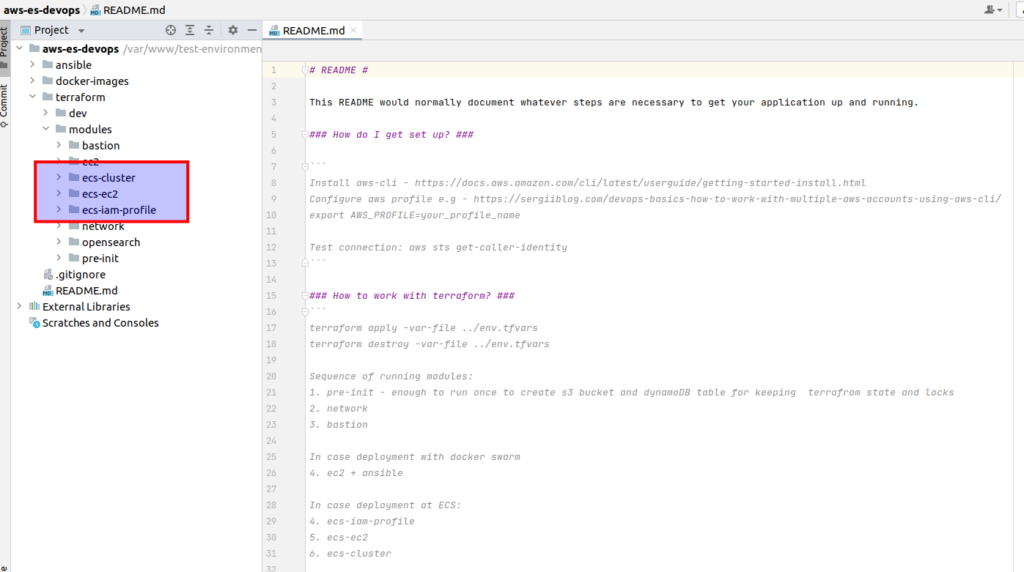
That is ecs-ec2 module. As you can guess that will place EC2 instances with pre-installed ECS agents at every private network. The next one is ecs-cluster module – that will configure for us all AWS ECS related stuff. But there is one more module here – it is called ecs-iam-profile. The deal is that we will also have to configure some security aspects in order from one side – EC2 instances could operate as infrastructure for ECS, and from another side – we could use it for the Elasticsearch bootstrapping process. I decided to move all permissions/security aspects related to above mentioned things to a separate terrafrom module. Generally all that logic could be placed in an esc-ec2 module by itself, but for learning purposes it was more convenient for me to make it a separate module. First of all, it will allow us to clear the ec2 module, which even without security related things appears to be rather complicated. And at second, I really wanted to concentrate your attention in one place.
The deal is that identity access management and all related to its stuff is probably among the most tricky things at AWS. And I really hate whe people simply mention that you have to do “that and that…” and then when you ask them details – it appears that they don’t understand it by themselves. Generally it often happens in the context of AWS security policies and roles. Let’s do it in another way and try to understand indeed what access we really add and why we need it.
First of all let’s recall what an instance profile is – it is a wrapper for an IAM role that you can use to pass role information to an EC2 instance when the instance starts. To create the profile and pass to it the role as AWS wants we use next terraform code:
resource "aws_iam_instance_profile" "ec2_ecs_instance_profile" {
  name = "ecs-instance-profile"
  path = "/"
  role =  aws_iam_role.ec2_ecs_instance_role.id
}
Suppose, at that moment all is clear. Now let’s have what we have inside the role by itself. First of all we define assume_role_policy:
resource "aws_iam_role" "ec2_ecs_instance_role" {
  name               = "ec2-ecs-instance-role"
  path = "/"
  assume_role_policy = data.aws_iam_policy_document.ec2_ecs_instance_policy.json
}

data "aws_iam_policy_document" "ec2_ecs_instance_policy" {
  statement {
    actions = ["sts:AssumeRole"]

    principals {
      type        = "Service"
      identifiers = ["ec2.amazonaws.com"]
    }
  }
}
The most clear definition which I could find at AWS documentation sounds in the next way:
An assume role policy is a special policy associated with a role that controls which principals (users, other roles, AWS services, etc) can “assume” the role. Assuming a role means generating temporary credentials to act with the privileges granted by the access policies associated with that role.
Is it clear? Doubt 🙁
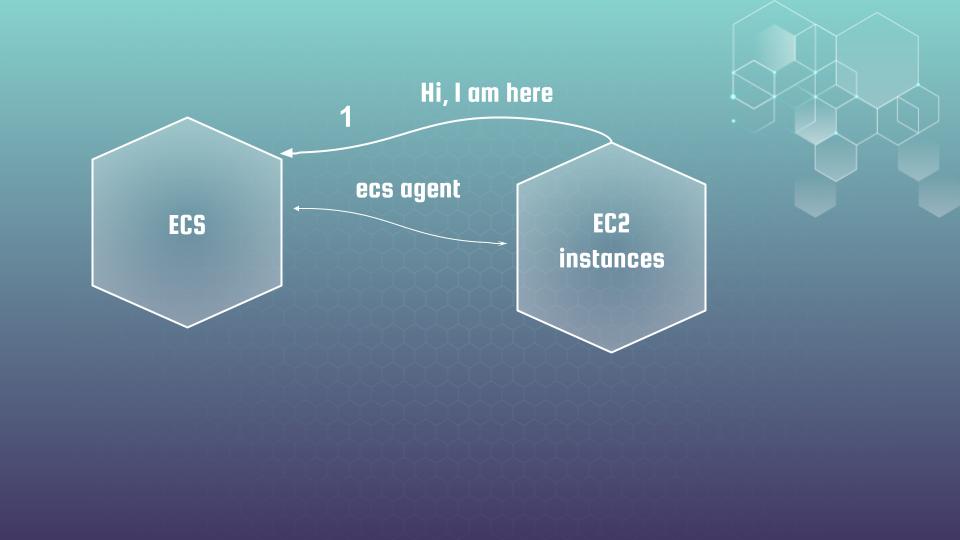
I will try to explain it at fingers with a simple example related to our case. So we have ECS which uses EC2 instances as infrastructure. The communication between instance and ECS is performed using ecs agent installed at EC2 instance. Let’s imagine that the 1st EC2 instance was started. And it says – “I am here”
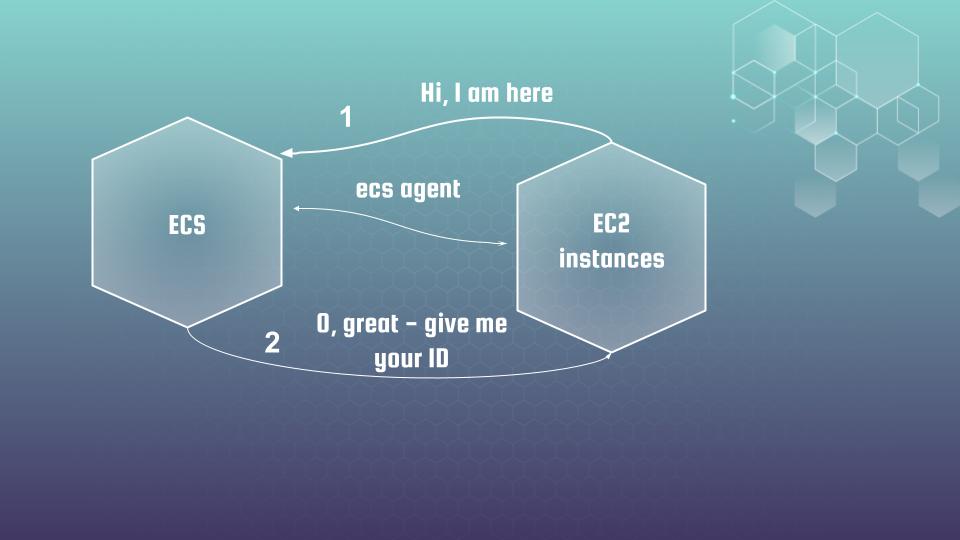
ECS says – “O, great, give me your ID in order I could register your properly”.
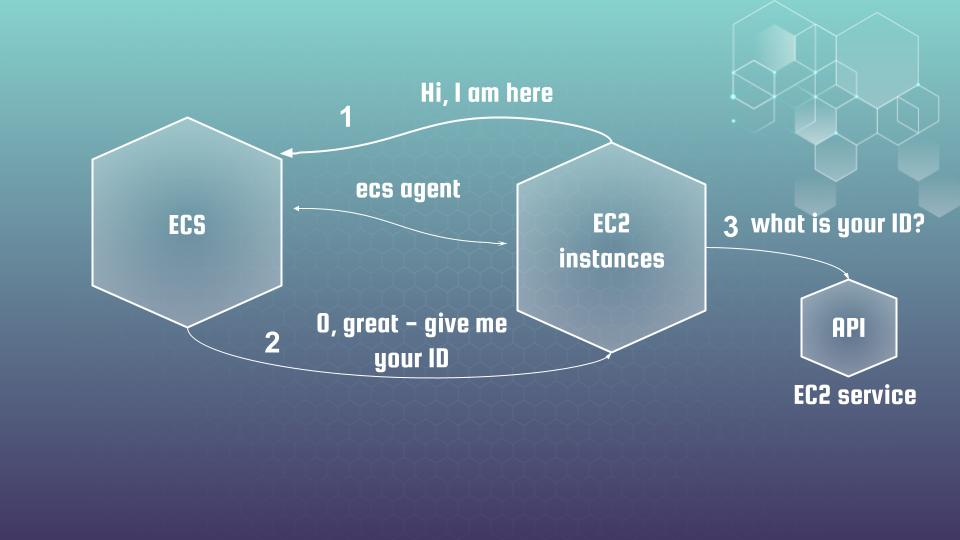
To do it ECS agent needs to make an API call to EC2 API to get it. But ecs agent will need permissions for that. And that is where assume role policy comes to help.
Now, let’s return to the terraform code that was already mentioned above again:
data "aws_iam_policy_document" "ec2_ecs_instance_policy" {
  statement {
    actions = ["sts:AssumeRole"]

    principals {
      type        = "Service"
      identifiers = ["ec2.amazonaws.com"]
    }
  }
}
We allow assuming action and then we tell what exactly we allow to assume – in that case we allow access to ec2 service. Such mechanisms allow ecs agent to act like a spy which pretends to be an EC2 instance. It gets EC2 service access by getting temporary credentials which are sent to agent during assume action. As for me, it is better to treat assuming role as a mechanism. And It is not useful if we will not define what exactly we allow to do using assuming mechanism by itself. To define a list of allowed operations we add policies.
For example – ec2 plugin required access to describe ec2 api. So we allow it and attach according policy to our assuming role:
resource "aws_iam_policy" "ec2_ecs_describe_policy" {
  name = "ec2-ecs-describe-policy"
  policy = <<EOF
{
  "Statement": [
    {
      "Action": [
        "ec2:DescribeInstances"
      ],
      "Effect": "Allow",
      "Resource": [
        "*"
      ]
    }
  ],
  "Version": "2012-10-17"
}
EOF
}

resource "aws_iam_role_policy_attachment" "ec2_es_describe_policy_attachment" {
  role = aws_iam_role.ec2_ecs_instance_role.name
  policy_arn = aws_iam_policy.ec2_ecs_describe_policy.arn
}
To work properly, ECS needs to perform different operations at EC2 instances. The list of those operations is already described by a predefined AWS role which is called AmazonEC2ContainerServiceforEC2Role. So we don’t need to guess what ECS really needs as it is already done by the AWS team and they support it – we simply can use a ready solution. So we are adding according policy as attachment also:
resource "aws_iam_role_policy_attachment" "ec2_ecs_instance_role_attachment" {
  role       = aws_iam_role.ec2_ecs_instance_role.name
  policy_arn = "arn:aws:iam::aws:policy/service-role/AmazonEC2ContainerServiceforEC2Role"
}
Ok, super, hope that now you understand clearly what we have here and what is used for. I want to tell here one more thing: generally speaking, assuming mechanism is a rather complicated thing and if you hear from somebody that he understands it at 100% within all possible scenarios – don’t believe him 🙂
Finally, the profile name is saved to the state as output in order we could use it further at ec2 module.
The implementation of creating an instance profile with assume role that includes all required policies can looks like as the next one:
terraform {
  backend "s3" {
    bucket         = "terraform-state-aws-es-devops"
    dynamodb_table = "terraform-state-aws-es-devops"
    encrypt        = true
    key            = "dev-iam-profile-ecs.tfstate"
    region         = "eu-central-1"
  }
}

data "terraform_remote_state" "network" {
  backend = "s3"

  config = {
    bucket = "terraform-state-aws-es-devops"
    key    = "dev-network.tfstate"
    region = var.region
  }
}

provider "aws" {
  allowed_account_ids = [var.account_id]
  region              = var.region
}

module "ecs-iam-profile" {
  source = "../../modules/ecs-iam-profile"

  account_id = var.account_id
  env        = var.env
  project    = var.project
  region     = var.region
}
So, great, we have finished with ec2 instance profile and now we are ready to deploy EC2 instances. Let’s do it in the next lecture. In case you want to download the whole ecs iam profile terraform module with all files (the same as other terraform ecs related modules and implementations) in easy and simple way – welcome to my course at udemy 🙂 As the reader of that blog you are also getting possibility to use coupon for the best possible low price.